You’re ready to grow your own garlic, but don’t know quite where to begin?
Have no fear, garlic is a very forgiving crop and easy to harvest a bounty to be shared with your friends. Below we’ve outlined the steps to grow, harvest, and store your own garlic, all the while trying to withhold as many of the bad jokes as we could…
I – When to Plant Garlic
The ideal time to plant your garlic is right after the first frost of the fall. Seems weird, I know, but this way your garlic can get established for the long winter ahead.
When planting garlic, instead of planting seed, you’ll plant the actual garlic cloves. This is very similar to planting seed potatoes instead of potato seed.
One more thing to remember about the cloves your plant, the larger the clove, the larger the bulb you’ll harvest.

- Planting a garlic clove. (Courtesy of MyLittleCity FoodGarden.com)
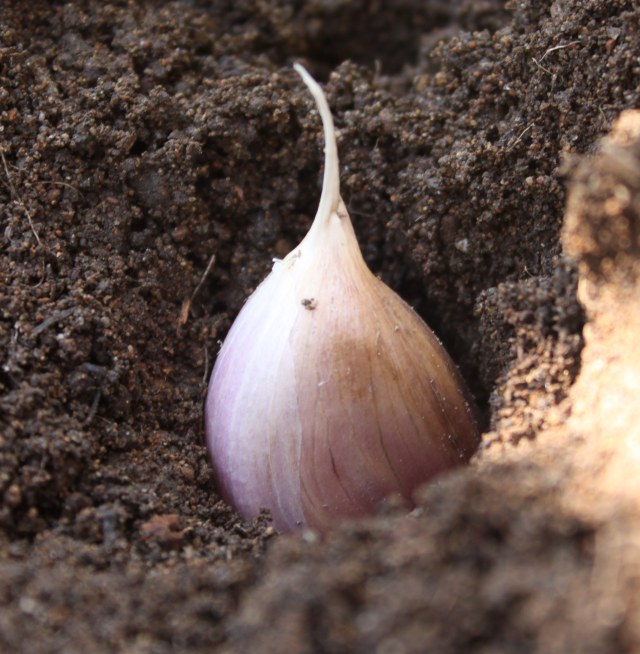
To plant your garlic cloves, simply place the clove, rootside down (pointy side up) in the soil 2 inches, cover with soil, and then cover again with at least 6” of mulch. The added mulch will ensure that your crop has adequate moisture, protection from the elements, and a stable temperature to grow in.
II – Choosing a Variety
Now for the fun part! Firstly, I’d say, choose a couple different varieties so you can see the differences in how they grow, their yield, and most importantly, of all, their flavor!
There are two different types of garlic. Hardneck and softneck.
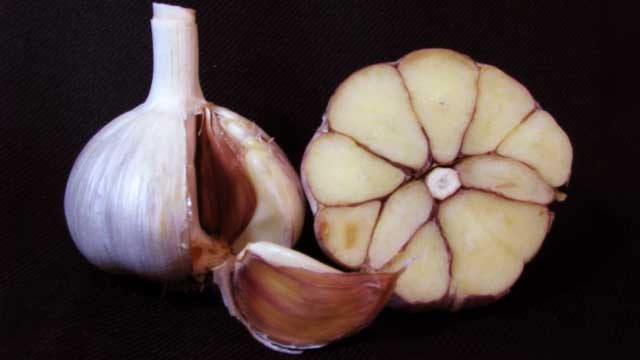
Hardneck Garlic
Hardneck are so called because… they have a hard neck!
Hardnecks are the … HARDier of the two. So, they are often more popular with more challenging growing climates of northern latitudes.
While hardnecks generally yield fewer clovers per bulb, the cloves themselves are bigger. Ah, the classic quandry, more versus bigger.
In the hardneck garlic family, there are 9 sub-types to choose from:
- Purple Stripe Garlic
- Marbled Purple Stripe Garlic
- Glazed Purple Stripe Garlic
- (Starting to sound like Bubba talkin’ shrimp – https://www.youtube.com/watch?v=09KL2HUXE6Q)
- Asiatic
- Creole
- Middle Eastern
- Turban
- Rocambole
- Porcelain
These varieties are known for their over the top flavors ranging from inferno-esque heat (Georgian Fire), all the way to the sweetest of the sweet (purple italian).
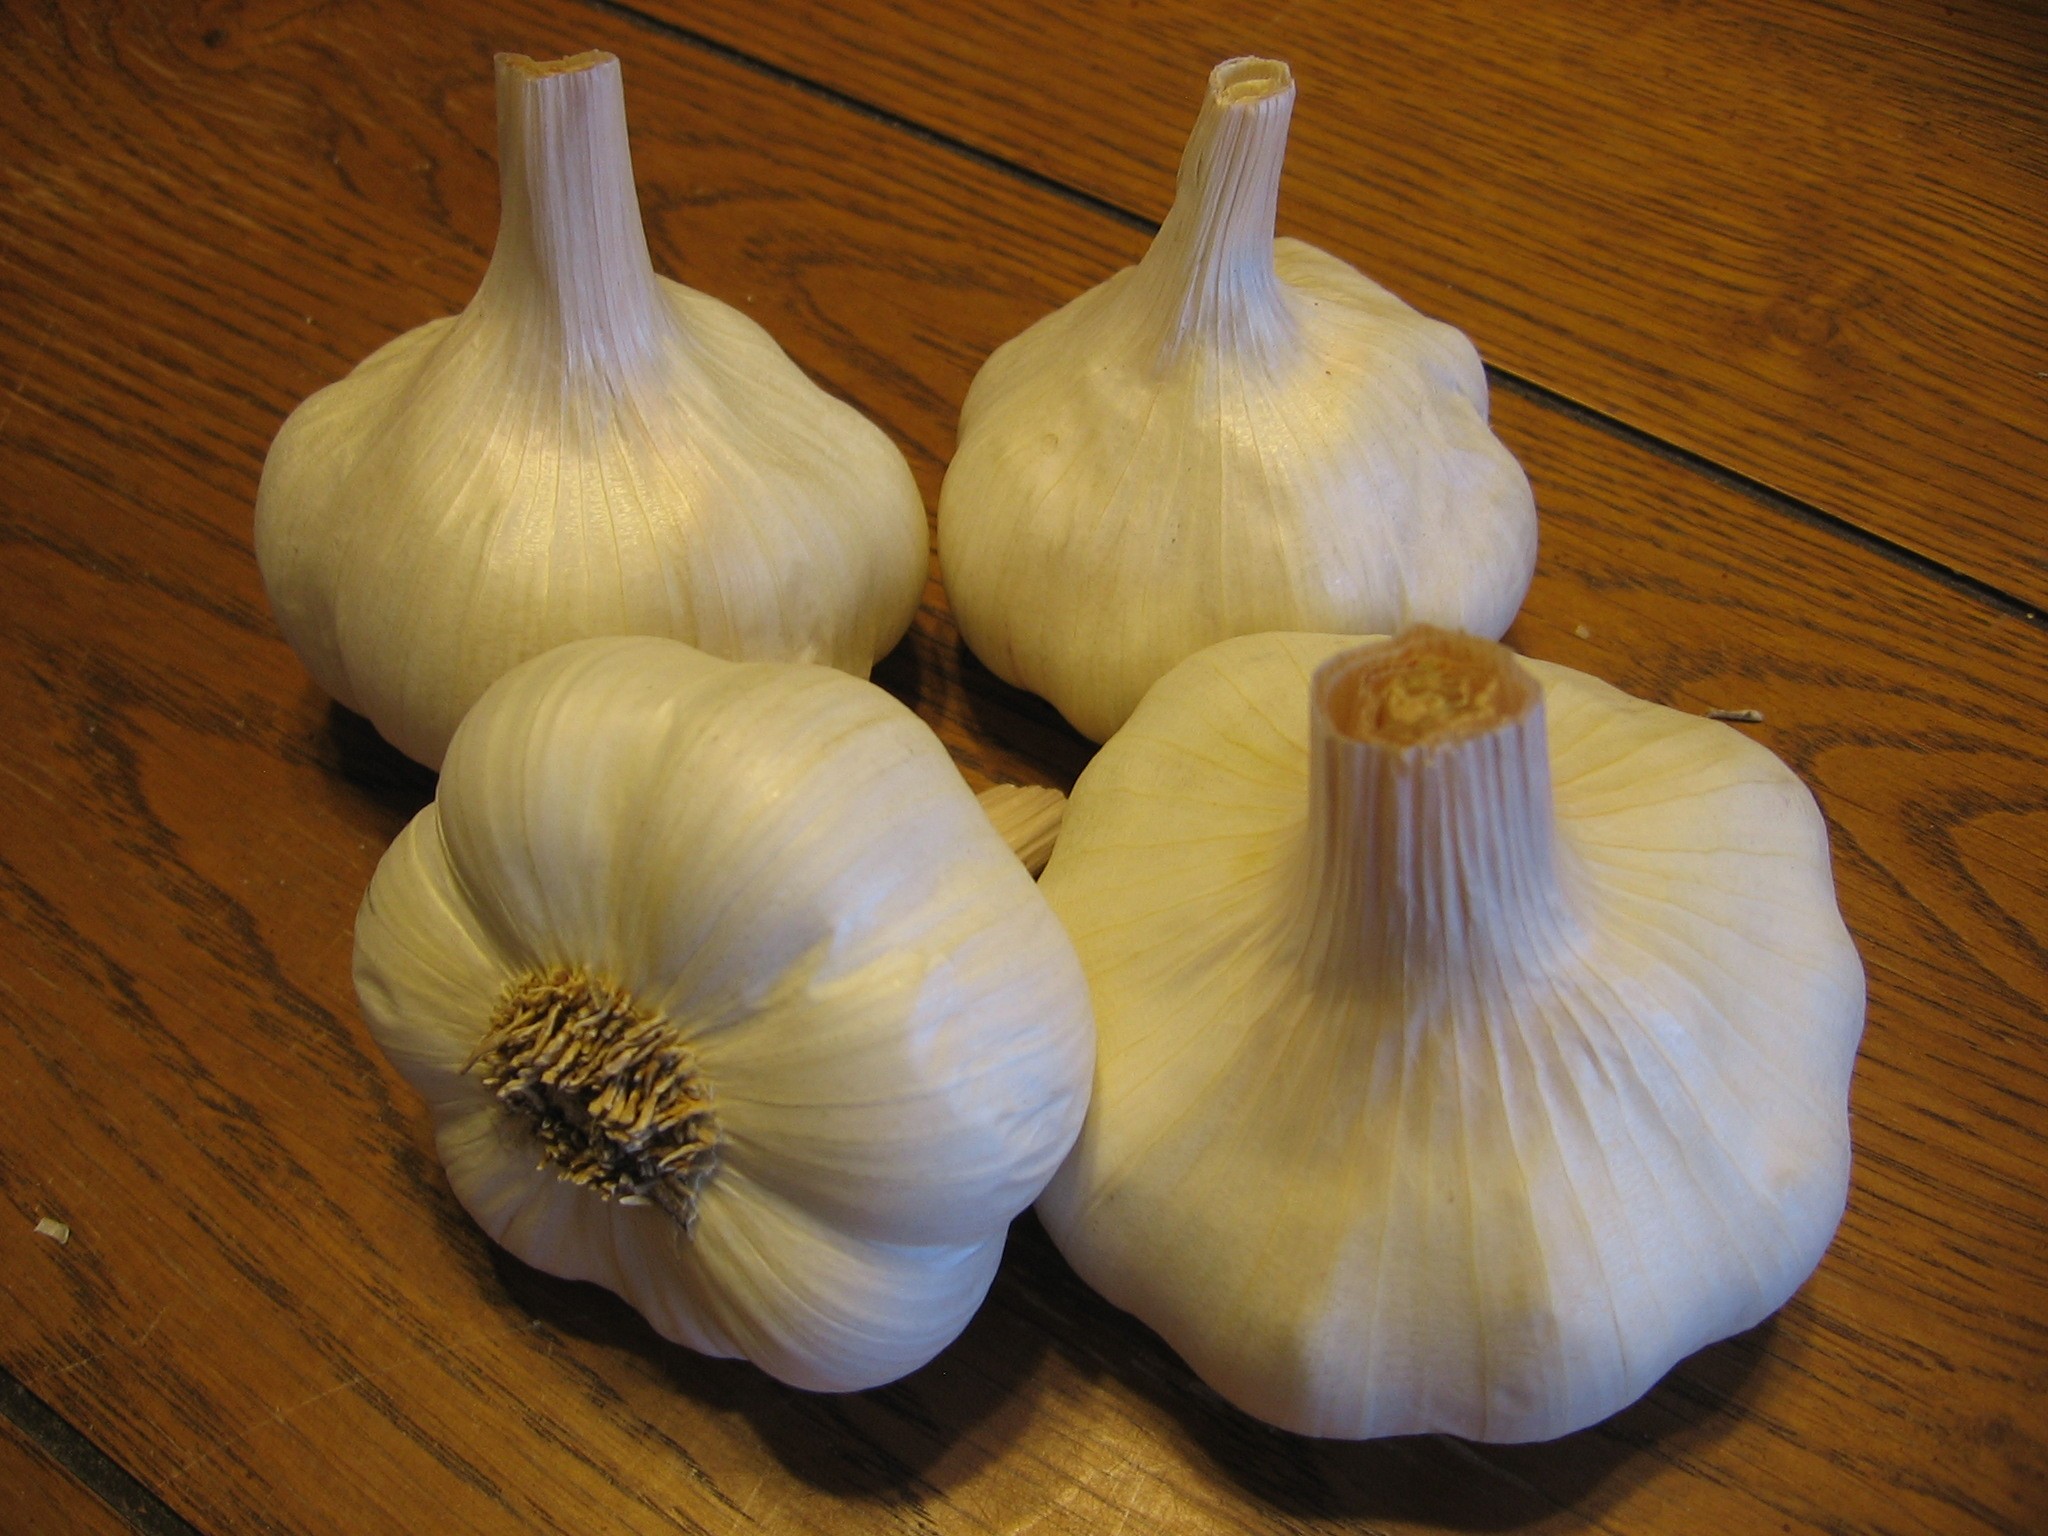
Softneck Garlic
Soft neck are named because of their soft neck. Pretty simple.
The most notable qualities of softneck garlic are their excellent storing qualities. The bulbs are often larger, with more cloves per bulb than their hardneck counterparts. The necks are soft, and thus, easier for braiding.
Some popular varieties of softneck garlic are:
- California Early
- Chet’s Italian Red
- Early Italian Red
- Inchelium Red
- Kettle River Giant
- Nootka Rose
- Oregon Blue
- Polish White
- Red Toch
- Siciliano
- Susanville
- Silver White
- Transylvanian
III – Maintenance
Garlic, despite repelling vampires, actually struggles in the battle with weeds. The two big challenges that weeds will present to your garlic is: competing for the nutrients in the soil, and competing for sunlight above the ground. Your mission is to make sure that no weeds starve your garlic of nutrients or sunlight.
So, when you see a few competing weeds, feel free to behead them and use them as mulch. Just make sure they haven’t already gone to seed or are prone to rooting their cuttings, because that will just make more weeds that you’ll have to contend with. If that is the case, you’ll want to hot compost those weeds in order to kill them AND their offspring. If you aren’t setup to hot compost them, go ahead and use them as a mulch somewhere in your yard where it will be ok if you have a bit of “wildness.” The last resort is to put them in the green bin, but we both know your mama raised you better than to waste good organic matter…
IV – Water
It varies variety by variety, but it is common for garlic to desire 1” of water per week. How much is 1” of water you ask? Well, a good rule of thumb is to dig your hand about 4” into the mulch (you remembered to mulch, right?) and at that depth, the soil/mulch should have the moisture of a nice chocolate cake. If it’s drier than that, give it more water. If it’s wetter, ease up on the water, and let your cake bake a little longer.
V – Garlic Scapes
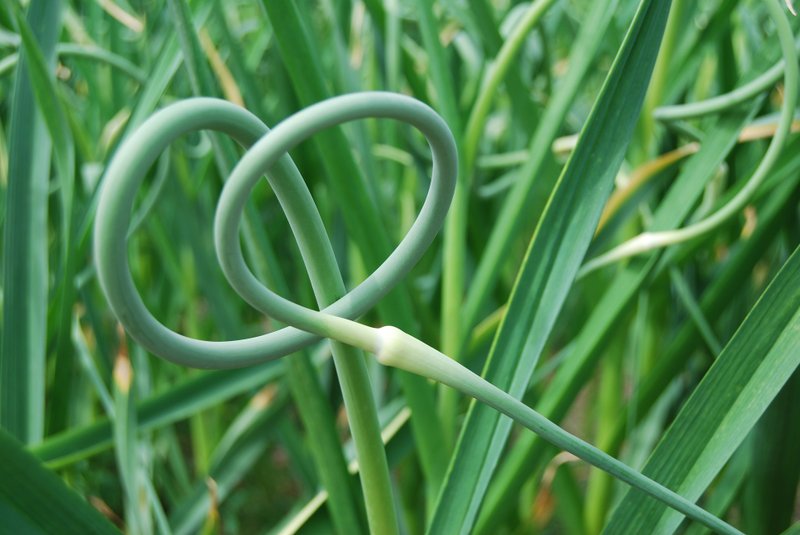
With hardneck garlic, 4-6 weeks before your garlic is mature, scapes will start to appear. These curly-q necks are the flower head forming. Go ahead and give these the Queen Mary treatment. That’s right, cut them off at the base of their scape neck right where they come from off of the plant.
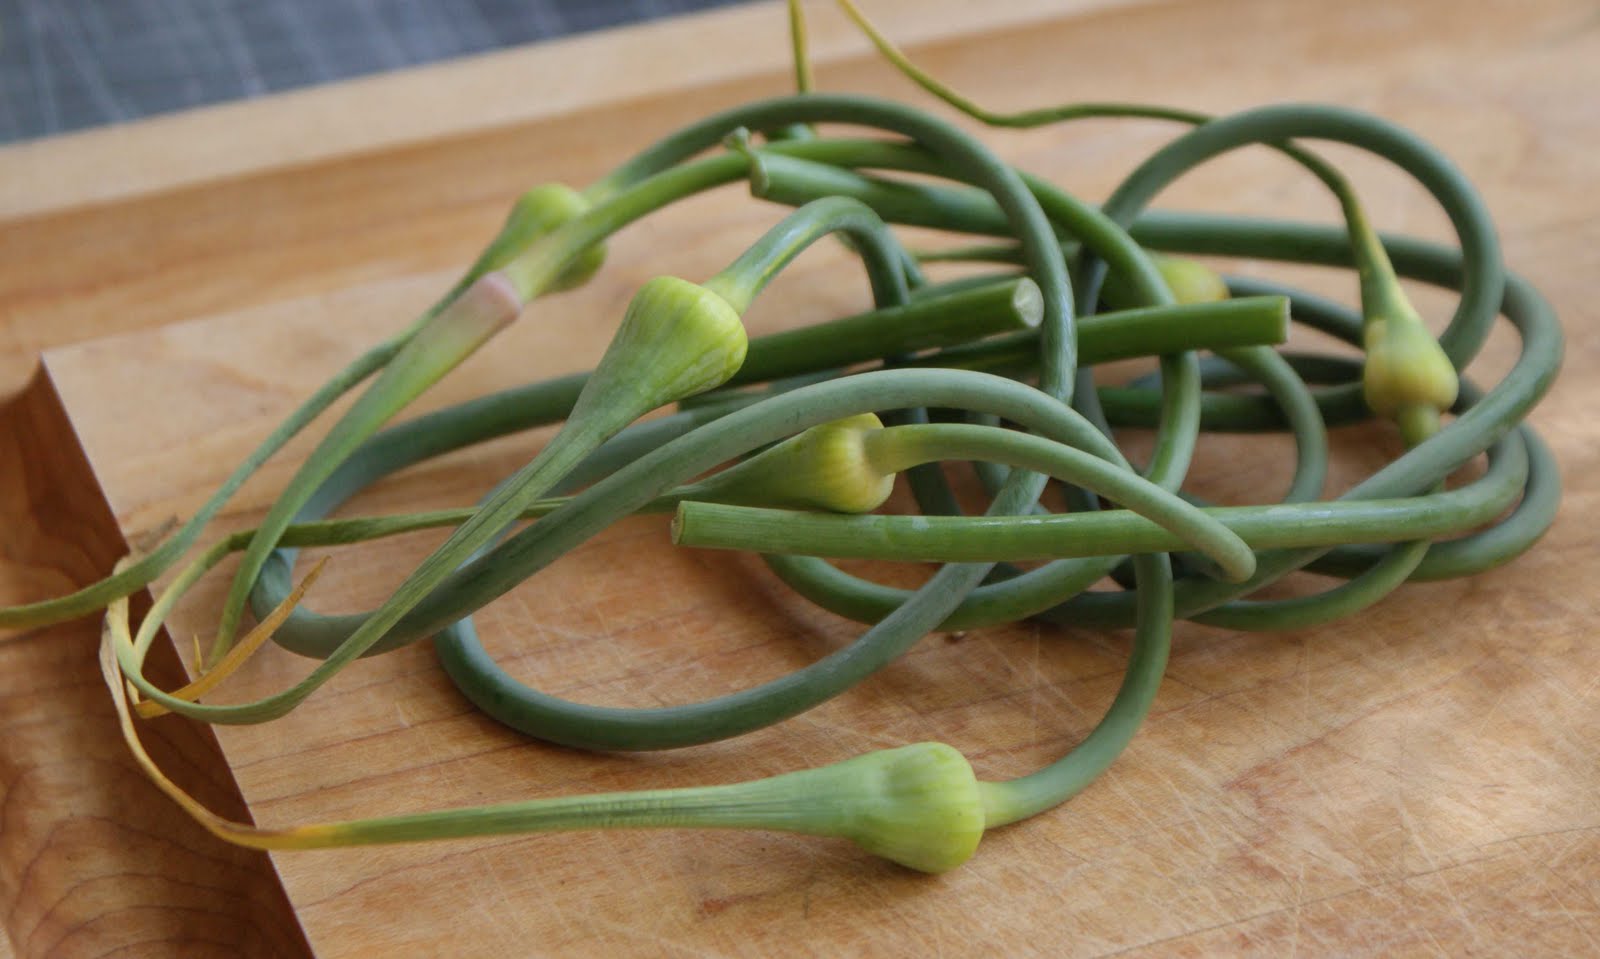
After you’ve gone through and es scaped (har har) all of your hardneck garlic, you’ll have quite a basket of scapes to deal with. Don’t compost those! Let your body compost them! They are delicious. In fact, here’s a list of incredible scape recipes.
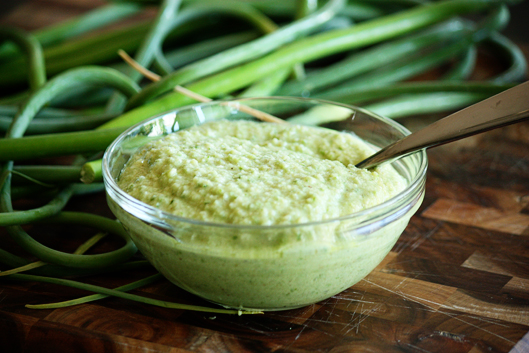
Garlic Scape Recipes
Spinach, Pea, and Garlic Scape Soup (Dinner with Julie)
Garlic Scape Pesto (All Recipes)
Grilled Garlic Scapes with Black Pepper + Sea Salt (With Food and Love)
VI – When to Harvest
You’ll know it’s time to harvest your garlic when you’re bread is properly buttered… no. It’s time to harvest your garlic when the tops begin to yellow and fall over, before they are completely dry.
Harvesting too late – If you wait until the leaves are entirely brown there will be less protection for the bulb.
Harvesting too soon – However, if you’re early to harvest, the cloves will start to separate creating a bulb that won’t store as long.
Harvesting at the right time – The ideal time to harvest is when the lower half of the leaves turn brown and the top leaves are still green. In many northern hemisphere climates, this is around mid-late July.
VII – How to harvest
There are plenty of right ways to harvest, and just one big fat wrong way. Whatever you do, make sure you don’t pull a rookie move and try to harvest by pulling from the above ground stems. You’ll break off the top stem, and expose your garlic top to drying out.
The simplest method is to use a broadfork to get the teeth right underneath the bulbs and loosen the soil. After loosening all of your garlic bulbs, follow back through picking the garlic from the soil and placing them in your tote.
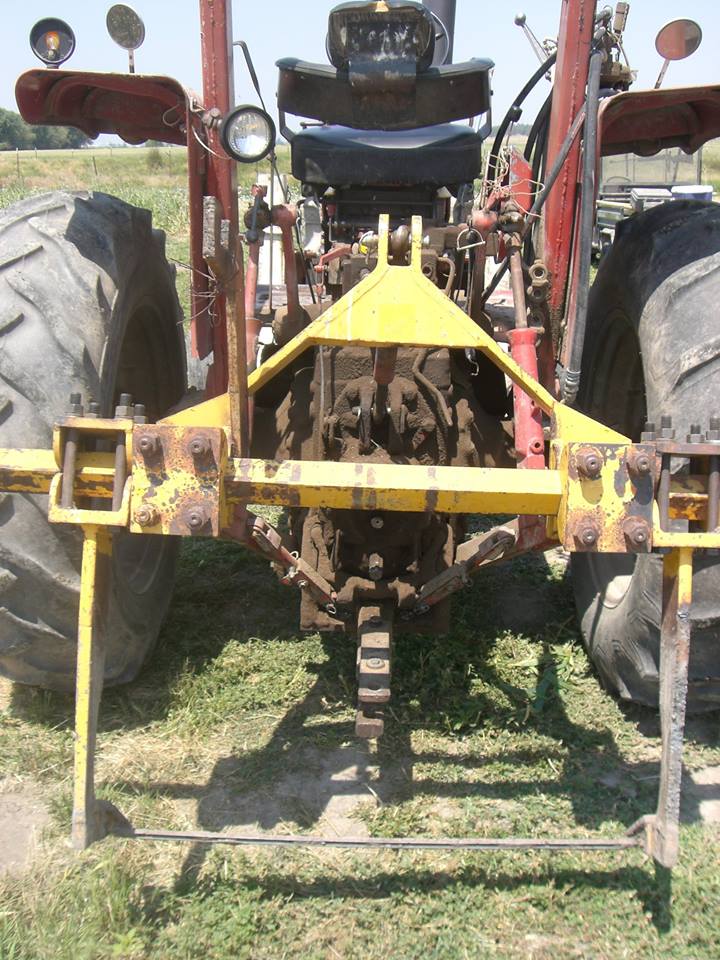
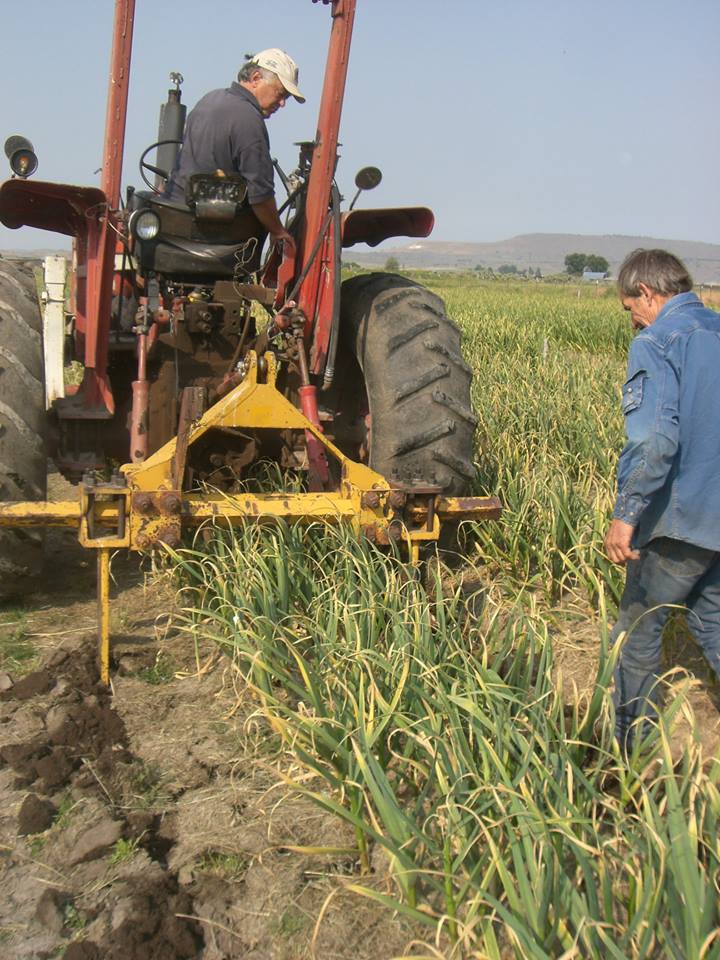
A more sophisticated method that some of our growers use, involves the use of a “cutter” or “lifter.” These tools, often homemade, are dragged behind a tractor in line with the beds and used to loosen the soil, and pop the garlic up. A setup like this is practically essential for anyone harvesting more than 1 acre of garlic.
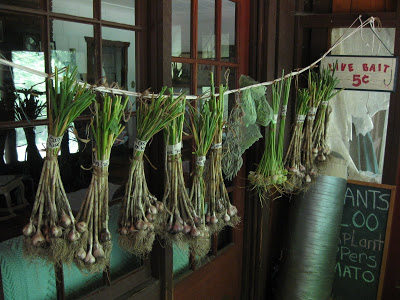
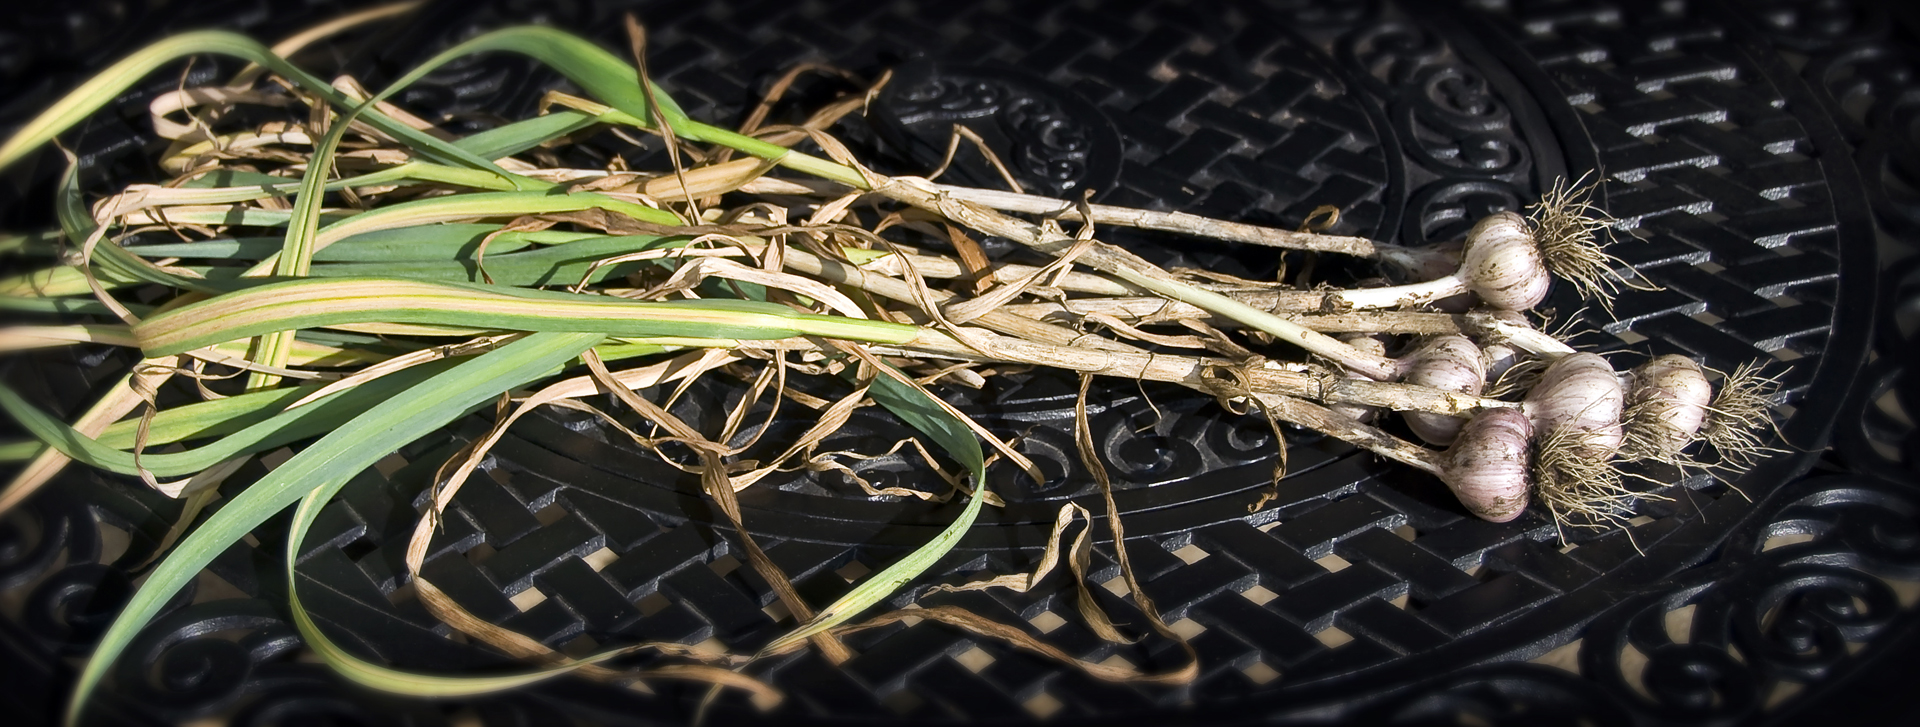
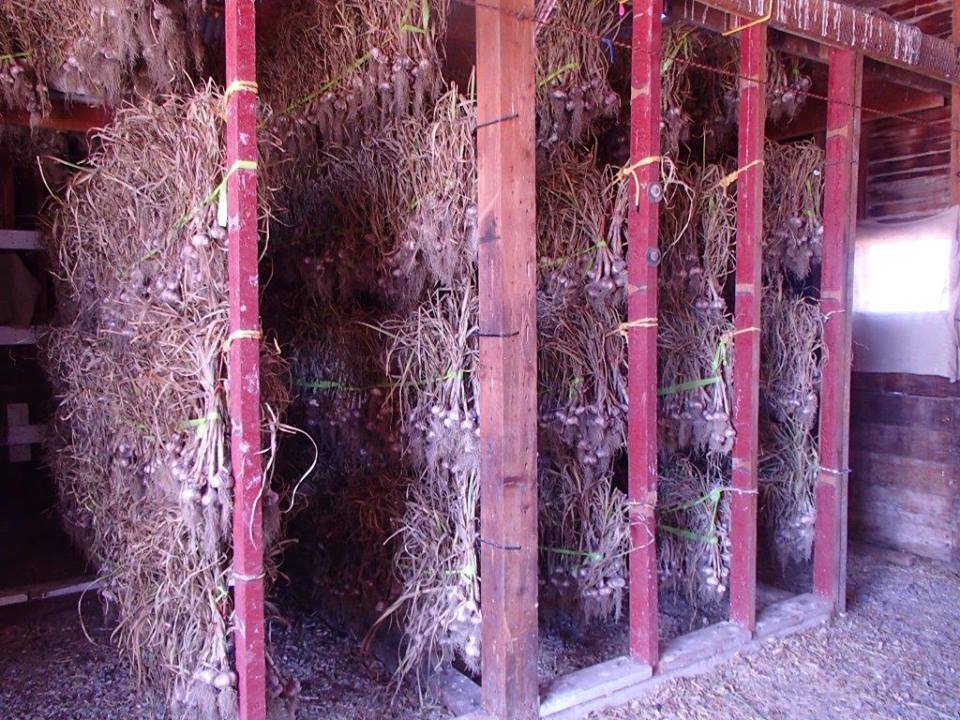
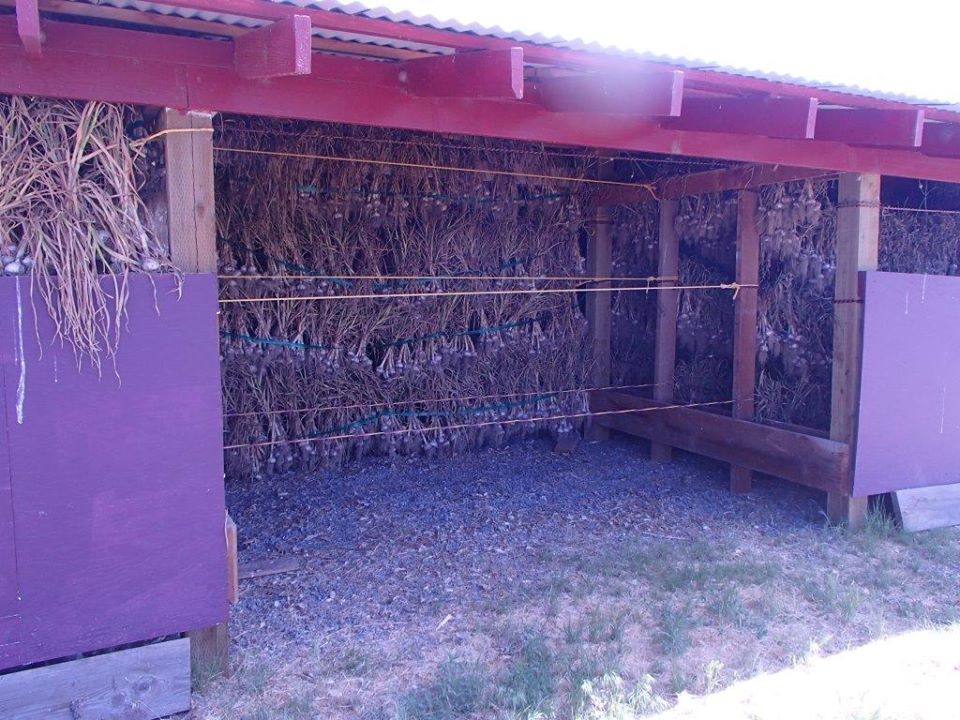
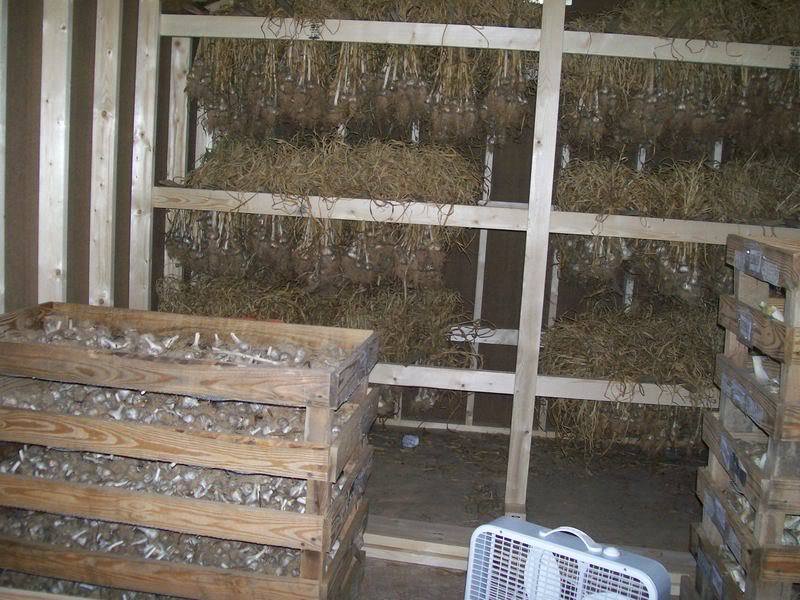
VIII – How to Dry and Store Garlic
Now that you’ve harvested your goal is to get your garlic dried out completely before it gets wet.. Our garlic seed growers’ scariest time of the season is immediately after they’ve harvested their garlic. If the rain comes and gets their garlic it can ruin their entire crop!
To dry your crop adequately, you’ll want to dry it upside down until it is completely dry. This is often about 2-4 weeks depending on the humidity and presence of a nice dry wind.
Your goal in storing your garlic crop, as well as life… is to just keep it cool. Man.
Well actually, cool isn’t quite enough. You want to keep it:
- cool
- dry
- and dark.
So, maybe not exactly like life. Unless you’re a bat…
Here are a few different ways that people store their garlic.
X- A Timeline of Growing Garlic
September – November -After your first frost, plant your garlic
Winter – leave it be
Spring – Weed as they come up. The more mulch you have, the less weeding you’ll need to do, and the easier it will be
Spring (Optional)– If you forgot to plant your garlic last september, don’t sweat it, you can still plant your garlic this spring and everything will be ok. The bulbs you harvest will be a bit smaller, but it sure beats no garlic!
Early-mid June – Watch for your garlic scapes. Cut them off and eat those tasty things! (See the recipe links below)
Mid – Late July – Harvest and start curing your garlic crop!
Mid- August – After your garlic is properly cured, store it in a cool, dry place until you’re ready to eat it or share with your friends.
September – November – Plant your favorite garlic bulbs remembering that the size of the clove you plant will be comparable to the size of the bulb you harvest next year.
There you have it, you’re all ready to grow some garlic. Now, it’s time to get some seed directly from one of our growers. Click the link below to choose your variety
Find your Garlic Seed