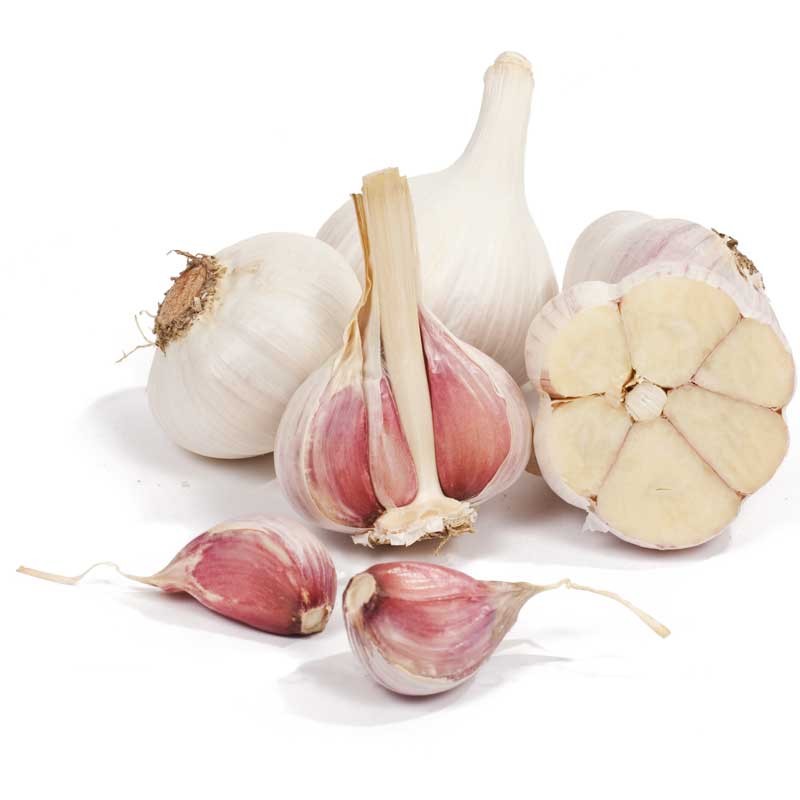
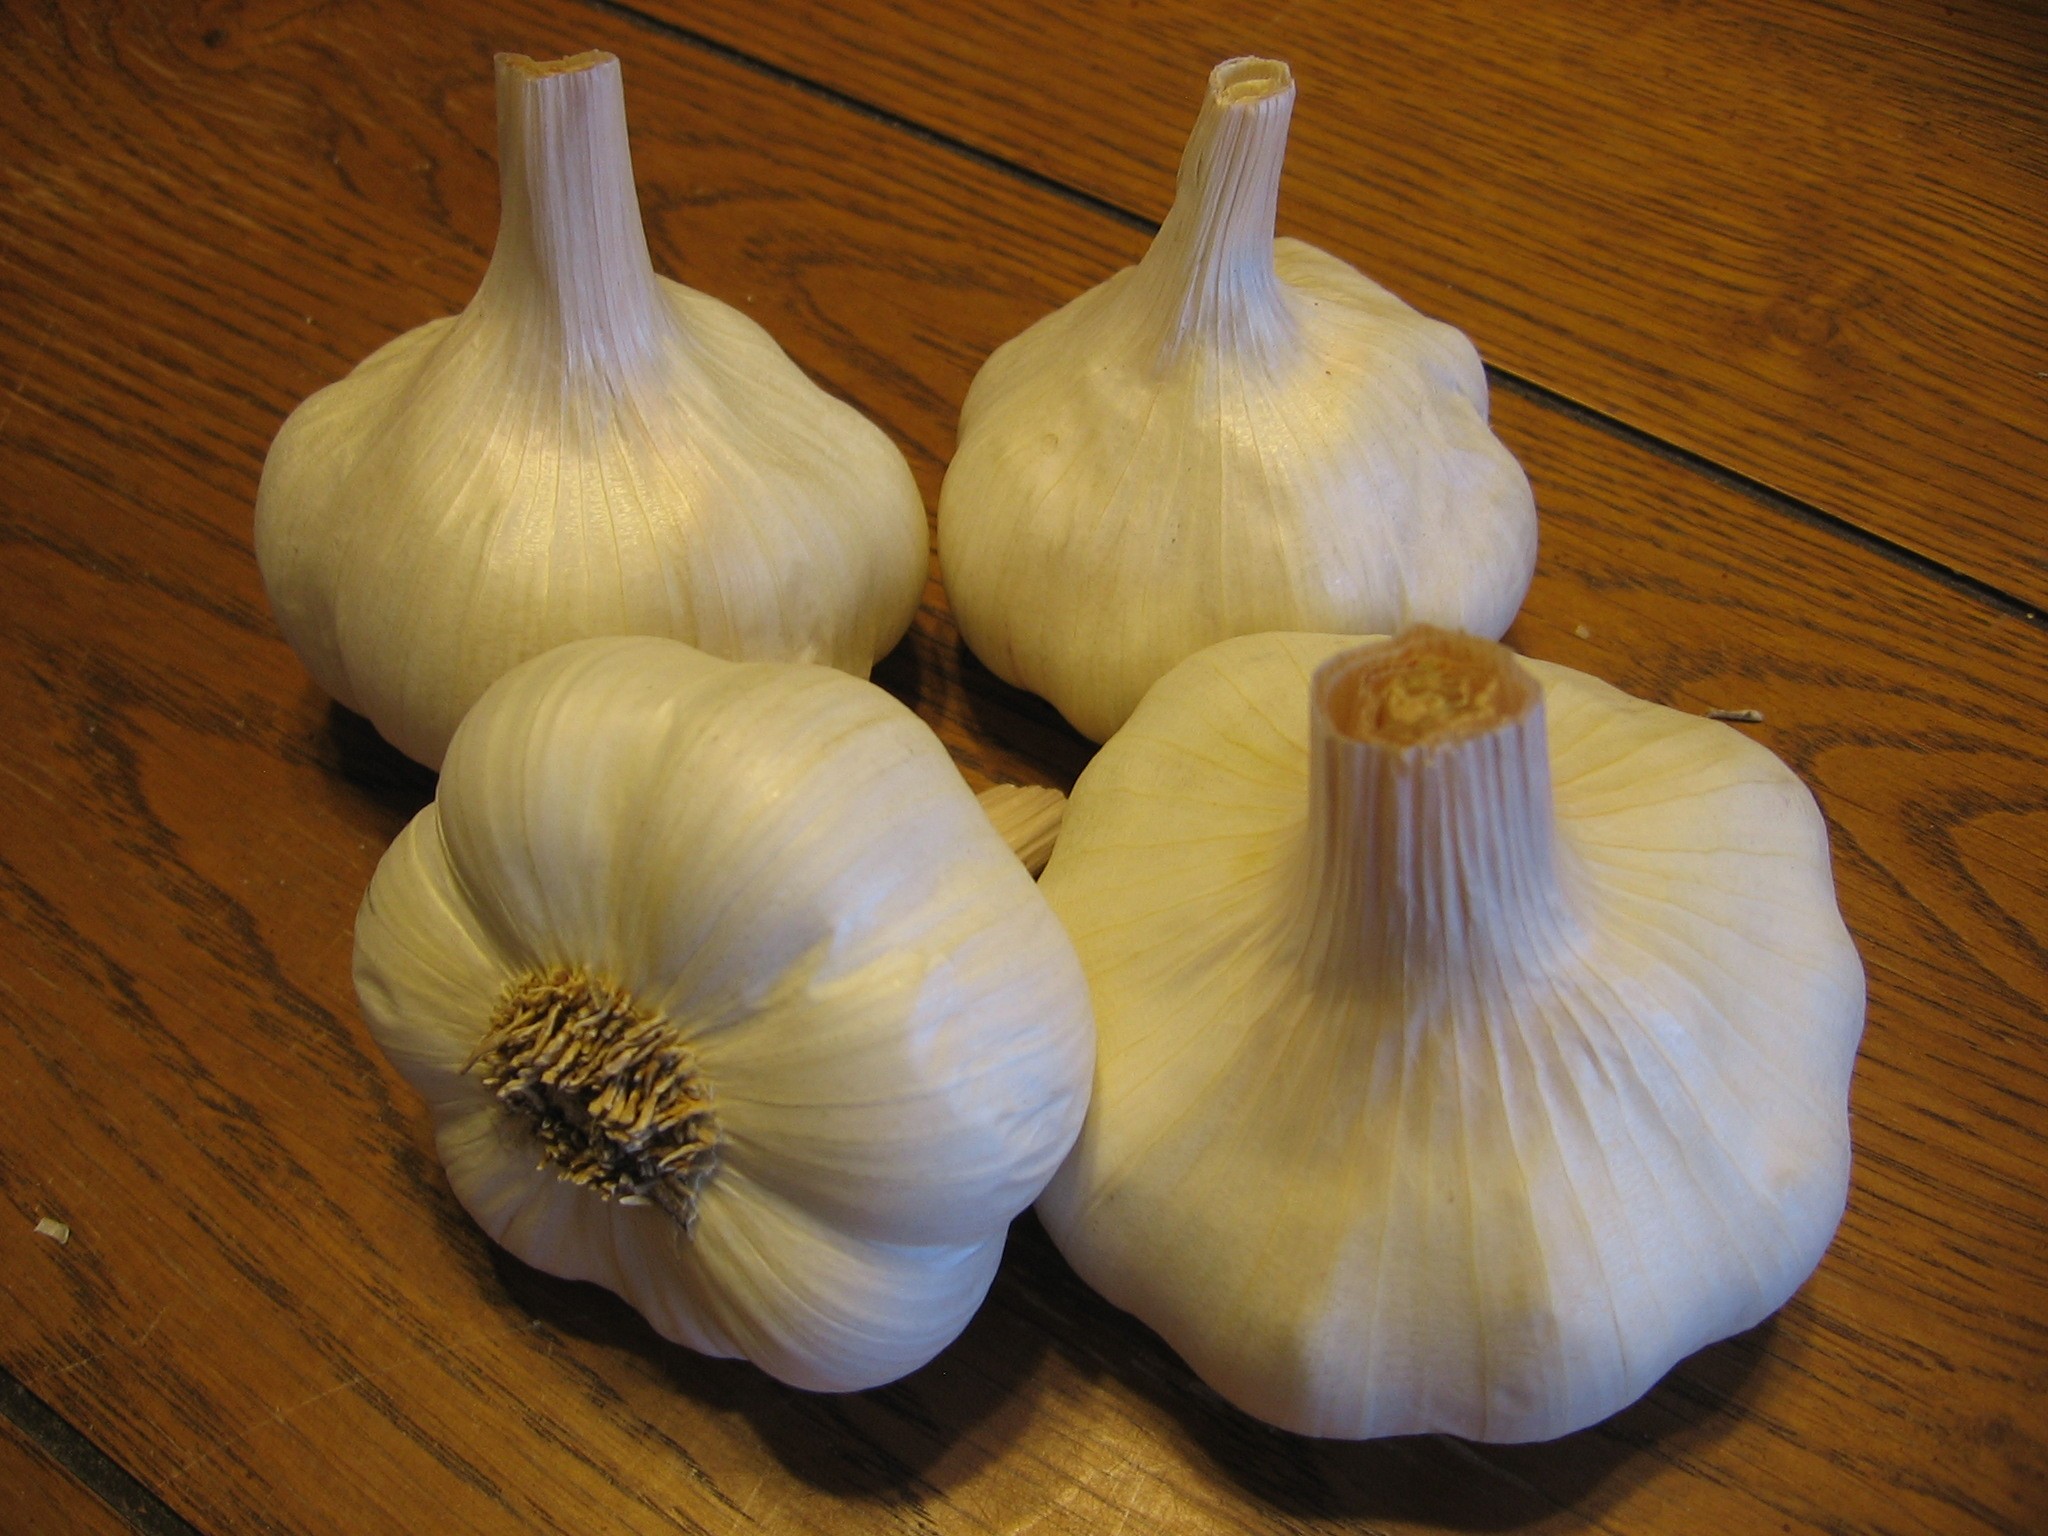
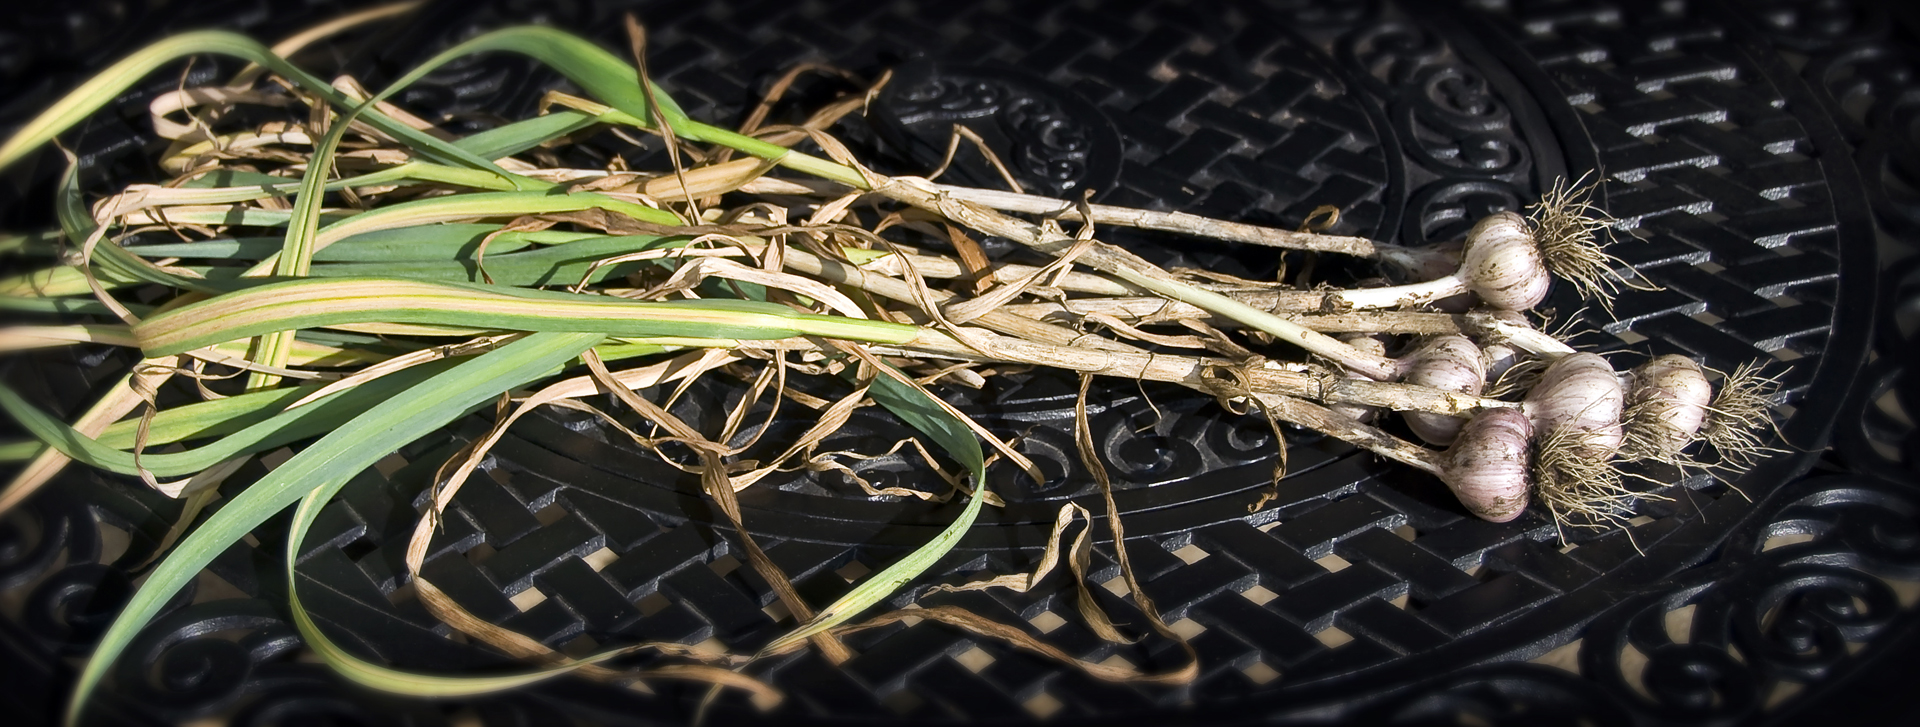
Russian Red Garlic (Photo courtesy of groworganic.com)
History
Do you know who’s responsible for bringing Russian Red garlic to the Pacific Northwest? I’ll give you two hints:
Hint #1 – It’s a big country that you can see from Alaska.
Hint #2- It’s Russia.
Did you figure it out yet? Yup, your gut, and reading skills, have brought you to the right answer once again.
In the early 1900s Russian Doukhobor immigrants, in their (successful) effort to escape the tyranical and oppressive Czarist Government, brought Russian Red along with them to the Pacific Northwest, more specifically, British Columbia. In fact, the Canadian government was very welcoming to the Doukhobors, to the point of granting them land that is now Saskatchewan and Manitoba. Nobody knows if the Russian Red Garlic “sweetened” the deal for the Canadian governmet, but it sure is fun to imagine that they were going to turn Russian emigrants away until they were offered a handful of Russian Red garlic.
No. No, that most certainly did not happen.
Anyways, I think “Red Russian” is an ill-fitting name. Primarily because the people who brought it to North America, were trying to escape Russia, rather than promote it. The least, the namers of this variety could have done, was name it Doukhobor Red. I suppose that doesn’t quite have the alliteration we’ve all come to love in our titles. So how about? Doukhobor Damascena? No? Allright, Russian Red it is.
BUT! At least you know that the Doukhbors brought us this time-tested champion of a garlic variety.
Since the early 1900s, Russian Red has flourished as a commercial variety, especially by Canadian growers because of its success growing in colder winters. And, of course, no garlic could have thrived for so many decades without its dependable delicousness (appreciate the alliteration?) on the dinner table.
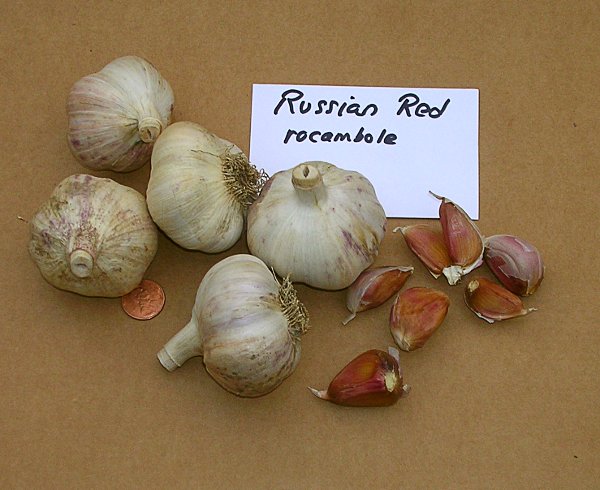
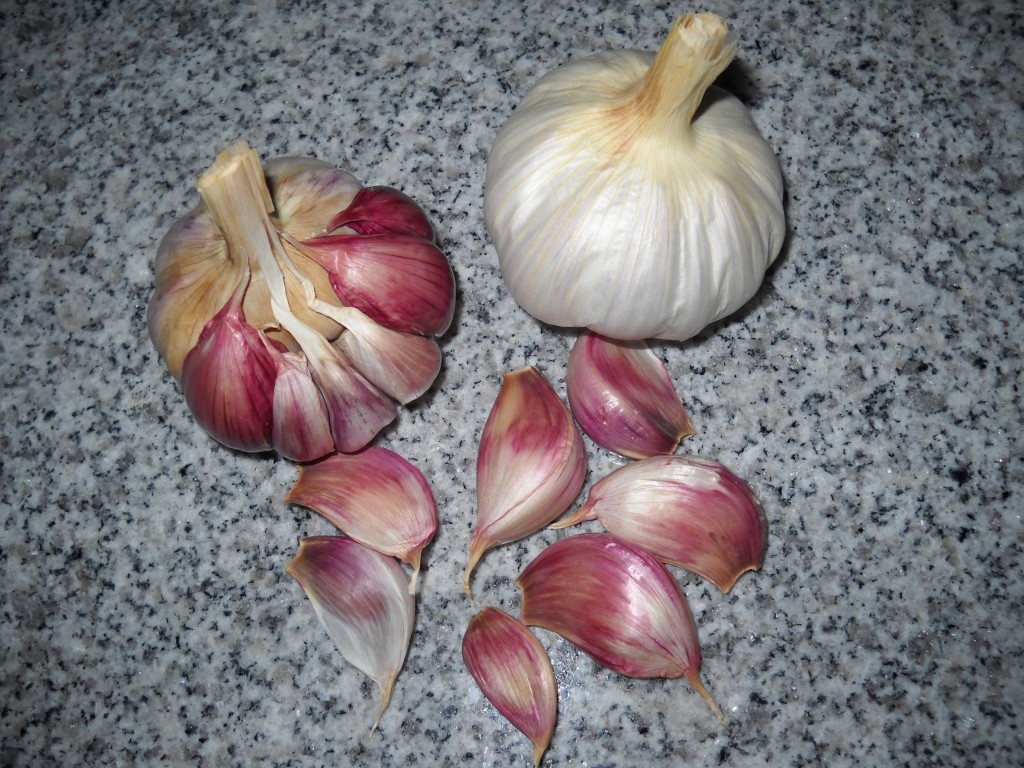
Note the dingy appearance of the wrapper (photo courtesy of teltanfarm.com)
Appearance
5-8 cloves per bulb
Less white than other hardneck varieties. Some may exclaim, “give that poor garlic a bath, post haste!” No, it’s not dirty, the wrapper is just a bit browner tinted. That’s all. While it is one of the… uglier garlics in the world, the toothsome taste will make all memories of its appearance fade away. Truly. Don’t turn this garlic away just because it may look like it needs a wash.
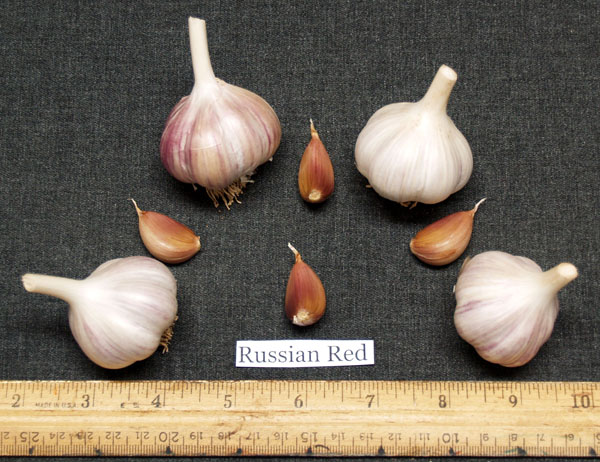
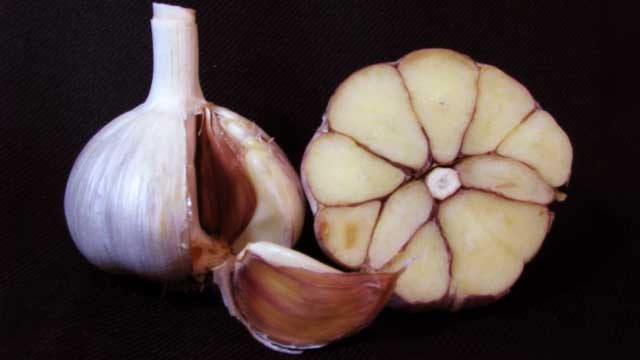
Bulbs and Cloves (photo courtesy of sev.iternet.edu)
To Grow
Zones – 3-8
Depth – 4 in.
Spacing – 6 in.
Light – Full Sun
Plant in the fall, and harvest mid-late summer the following year
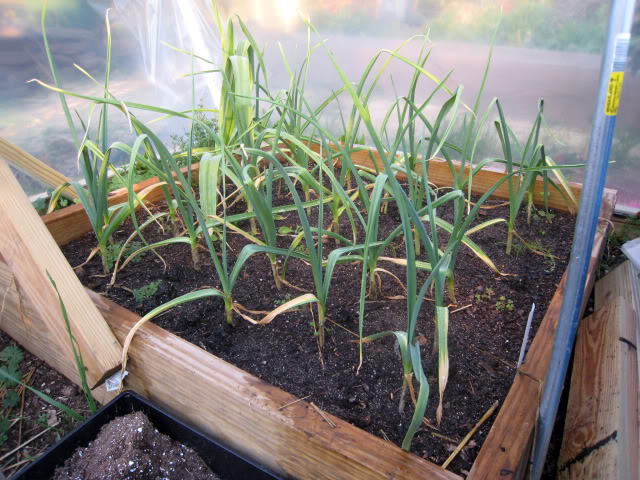
Russian Red Garlic likes a colder winter and colder spring. Again, many canadian growers love Russian Red for it’s ability to withstand the wet, soggy, winters.
Don’t grow Russian Red if you experience warm winters. What exactly is a warm winter? Just ask your uncle who plays golf in Fort Lauderdale from November to March every year. As a general rule of thumb, if you’re walking around in flip flops in February, grow a different variety of garlic best suited for warm winters.
Taste
The flavor is the big winner here.
It starts strong and finishes with a warm, sweet aftertaste.
The depth of the flavor is truly remarkable. A heat that won’t send you packing, but forever keep you snacking… that’s bad. But true. From me to you.
Start Growing
If you’re ready start growing these seeds, click the link below to see the different growers offering Russian Red here on SeedWise.
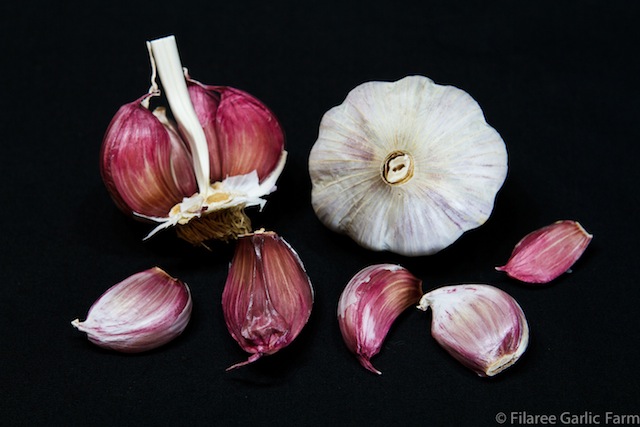
Ajo Rojo Garlic (photo courtesy of filareefarm.com)
Ajo Rojo is a great garlic to grow for beginners.
It”s resilience and low-maintenance make it an easy win for beginning gardeners.
Ajo Rojo Growing (Photo courtesy of cohutt.com)
History
Creole garlic varieties are hardy and smaller than other varieties of garlic. They grow best in the warmer climates of the Southern US and in the southern parts of Europe. Ajo Rojo is among the rare Creole varieties of garlic native to Spain and Europe where it was cultivated for centuries.
In the early 1990’s G. Lutovsky brought Ajo Rojo to Nevada from Spain. (I’m still trying to figure out more details about both G. Lutovsky and Ajo’s origins in Spain. If you have any leads, please let me know in the comments below.)
In southern parts of the US, Ajo Rojo is known as Mexican Purple. I don’t know where the name originated, but it does have a beautiful deep purple to it that you can see in the photos.
Ajo Rojo is a beautiful and distinctive garlic with red/burgundy clove wrappers and good storage. It sizes up nicely in warmer growing areas with many bulbs reaching 2″ diameter. A Vigorous root system and late harvest make for incredibly rich flavor.
Ajo Rojo garlic is a Creole variety of Allium sativum. Ajo is Spanish for garlic and Rojo means red. Ajo Rojo is considered a hardneck variety, yet it is genetically distinct from both hardneck and softneck varieties. Hardneck garlic has a woody, hard neck “scape” or flower stem growing in the center stem and grows well in colder climates, whereas softneck garlic grows best in warmer climates and has no flower stalk.
The size of a bulb of Ajo Rojo garlic is generally dependent on the climate, but a healthy bulb will grow to about two inches in diameter. The outer skin of the Ajo Rojo bulb is often called “silky” for its look and feel. Aside from that, the bulb has a very typical garlic look on the outside; it’s the individual cloves that reveal the signature “Rojo” or red color. There are typically eight to twelve cloves per bulb. The cloves of the Ajo Rojo garlic have a pungent aroma with a sweet taste and a warm, spicy finish.
Nutritional Value
The first recorded use of garlic for health benefits dates back to 1500BC Egypt. The active ingredient is allicin, which is released when the garlic is crushed or chopped. Aside from repelling vampires, garlic has anti-biotic properties and will help to build your immune system. Ajo Rojo’s red coloring is caused by anthocyanins, which are phytochemicals known to increase its antioxidant properties.
In Ajo Rojo, the antioxidant properties are even higher due to the presence of anthocyanins, the phytochemicals that produce the red color in the cloves.
Note the difference between the wrapper, the bulb, and the cloves (Photo courtesy of Texasheritagebulbs.com)
Taste
Ajo Rojo has two distinct tastes depending on how it’s prepared.
Prepared Raw: It has some serious heat! Teń cuidado señor! It starts subtle and gradually builds to a serious heat that will surprise you.
Baked: It is rich and creamy.
Like a nice wine, over time, the flavor will continue to improve.
Applications
Add Ajo Rojo to a variety of dishes that call for garlic. Ajo Rojo garlic retains much of its flavor when cooked. Creole garlics are great for fresh eating; chop and add to salsas or salad dressings. To enhance Creole dishes, finely chop garlic to release its essential oils for a bit more heat. Add sliced garlic to pasta sauce or soups or top pizzas.
Obviously there are limitless uses for this garlic, so let us know your favorite recipes using Ajo Rojo!
Where to buy Ajo Rojo Garlic
Did you know we sell seeds?
Well you’re in luck, here’s a link to Ajo Rojo we have for sale now:
You’re ready to grow your own garlic, but don’t know quite where to begin?
Have no fear, garlic is a very forgiving crop and easy to harvest a bounty to be shared with your friends. Below we’ve outlined the steps to grow, harvest, and store your own garlic, all the while trying to withhold as many of the bad jokes as we could…
I – When to Plant Garlic
The ideal time to plant your garlic is right after the first frost of the fall. Seems weird, I know, but this way your garlic can get established for the long winter ahead.
When planting garlic, instead of planting seed, you’ll plant the actual garlic cloves. This is very similar to planting seed potatoes instead of potato seed.
One more thing to remember about the cloves your plant, the larger the clove, the larger the bulb you’ll harvest.
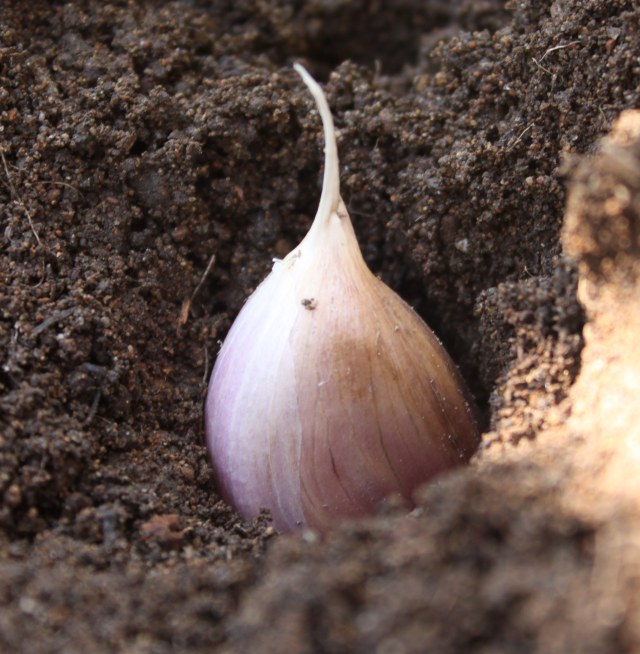
Planting a garlic clove. (Courtesy of MyLittleCity FoodGarden.com)
To plant your garlic cloves, simply place the clove, rootside down (pointy side up) in the soil 2 inches, cover with soil, and then cover again with at least 6” of mulch. The added mulch will ensure that your crop has adequate moisture, protection from the elements, and a stable temperature to grow in.
II – Choosing a Variety
Now for the fun part! Firstly, I’d say, choose a couple different varieties so you can see the differences in how they grow, their yield, and most importantly, of all, their flavor!
There are two different types of garlic. Hardneck and softneck.
A variety of Hardneck Garlic – German Red – Rocambole (Rasa Creek Farm)
Hardneck Garlic
Hardneck are so called because… they have a hard neck!
Hardnecks are the … HARDier of the two. So, they are often more popular with more challenging growing climates of northern latitudes.
While hardnecks generally yield fewer clovers per bulb, the cloves themselves are bigger. Ah, the classic quandry, more versus bigger.
In the hardneck garlic family, there are 9 sub-types to choose from:
These varieties are known for their over the top flavors ranging from inferno-esque heat (Georgian Fire), all the way to the sweetest of the sweet (purple italian).
A softneck variety of garlic, Red Tock (Forever Yong Farm)
Softneck Garlic
Soft neck are named because of their soft neck. Pretty simple.
The most notable qualities of softneck garlic are their excellent storing qualities. The bulbs are often larger, with more cloves per bulb than their hardneck counterparts. The necks are soft, and thus, easier for braiding.
Garlic, despite repelling vampires, actually struggles in the battle with weeds. The two big challenges that weeds will present to your garlic is: competing for the nutrients in the soil, and competing for sunlight above the ground. Your mission is to make sure that no weeds starve your garlic of nutrients or sunlight.
So, when you see a few competing weeds, feel free to behead them and use them as mulch. Just make sure they haven’t already gone to seed or are prone to rooting their cuttings, because that will just make more weeds that you’ll have to contend with. If that is the case, you’ll want to hot compost those weeds in order to kill them AND their offspring. If you aren’t setup to hot compost them, go ahead and use them as a mulch somewhere in your yard where it will be ok if you have a bit of “wildness.” The last resort is to put them in the green bin, but we both know your mama raised you better than to waste good organic matter…
IV – Water
It varies variety by variety, but it is common for garlic to desire 1” of water per week. How much is 1” of water you ask? Well, a good rule of thumb is to dig your hand about 4” into the mulch (you remembered to mulch, right?) and at that depth, the soil/mulch should have the moisture of a nice chocolate cake. If it’s drier than that, give it more water. If it’s wetter, ease up on the water, and let your cake bake a little longer.
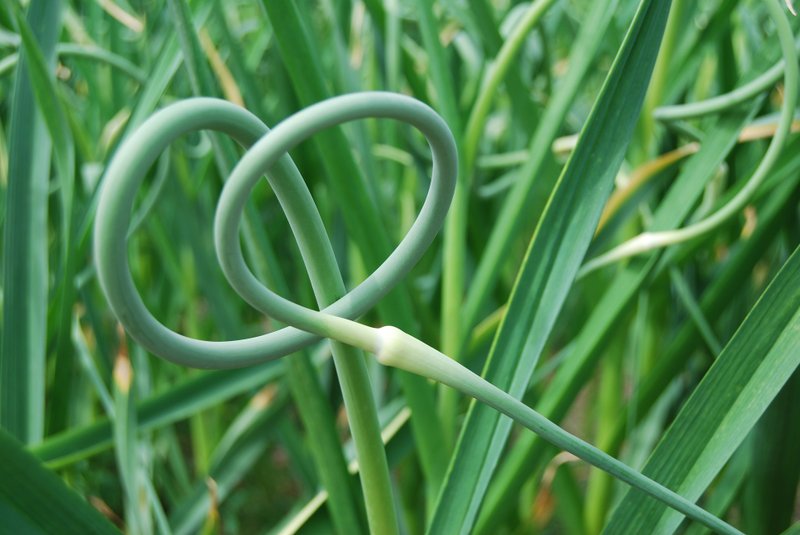
V – Garlic Scapes
A garlic scape in the buff – courtesy of GreenCityMarket.wordpress.com
With hardneck garlic, 4-6 weeks before your garlic is mature, scapes will start to appear. These curly-q necks are the flower head forming. Go ahead and give these the Queen Mary treatment. That’s right, cut them off at the base of their scape neck right where they come from off of the plant.
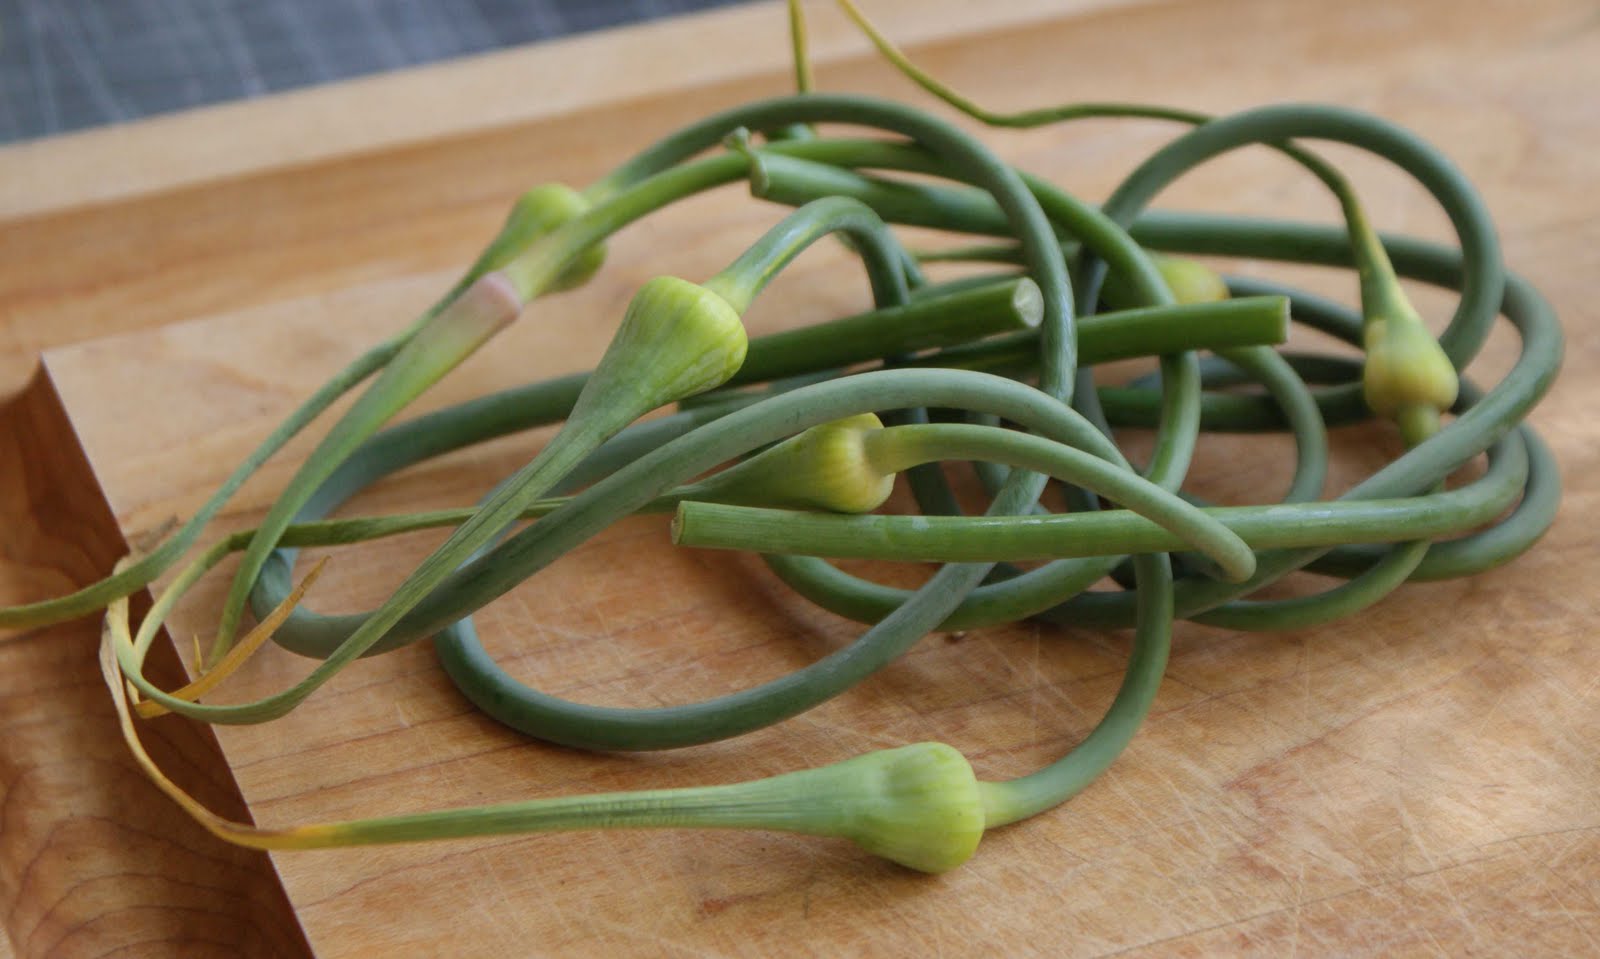
Garlic Scapes ready to be turned into a tasty meal – Image courtesy of DinnerwithJulie.com
After you’ve gone through and es scaped (har har) all of your hardneck garlic, you’ll have quite a basket of scapes to deal with. Don’t compost those! Let your body compost them! They are delicious. In fact, here’s a list of incredible scape recipes.
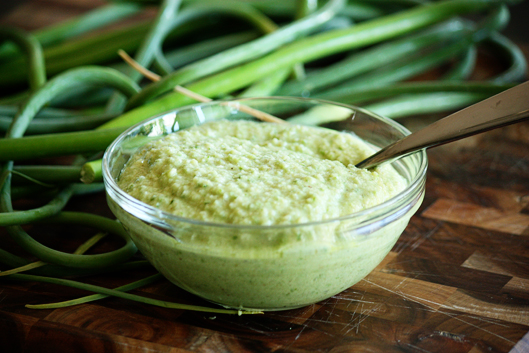
Garlic Scape Pesto (Image courtesy of unsophisticook.com)
Garlic post harvest (note the brown leaves on the bottom and the green leaves on top. (Image courtesy of thelittlegsp.com)
VI – When to Harvest
You’ll know it’s time to harvest your garlic when you’re bread is properly buttered… no. It’s time to harvest your garlic when the tops begin to yellow and fall over, before they are completely dry.
Harvesting too late – If you wait until the leaves are entirely brown there will be less protection for the bulb.
Harvesting too soon – However, if you’re early to harvest, the cloves will start to separate creating a bulb that won’t store as long.
Harvesting at the right time – The ideal time to harvest is when the lower half of the leaves turn brown and the top leaves are still green. In many northern hemisphere climates, this is around mid-late July.
VII – How to harvest
There are plenty of right ways to harvest, and just one big fat wrong way. Whatever you do, make sure you don’t pull a rookie move and try to harvest by pulling from the above ground stems. You’ll break off the top stem, and expose your garlic top to drying out.
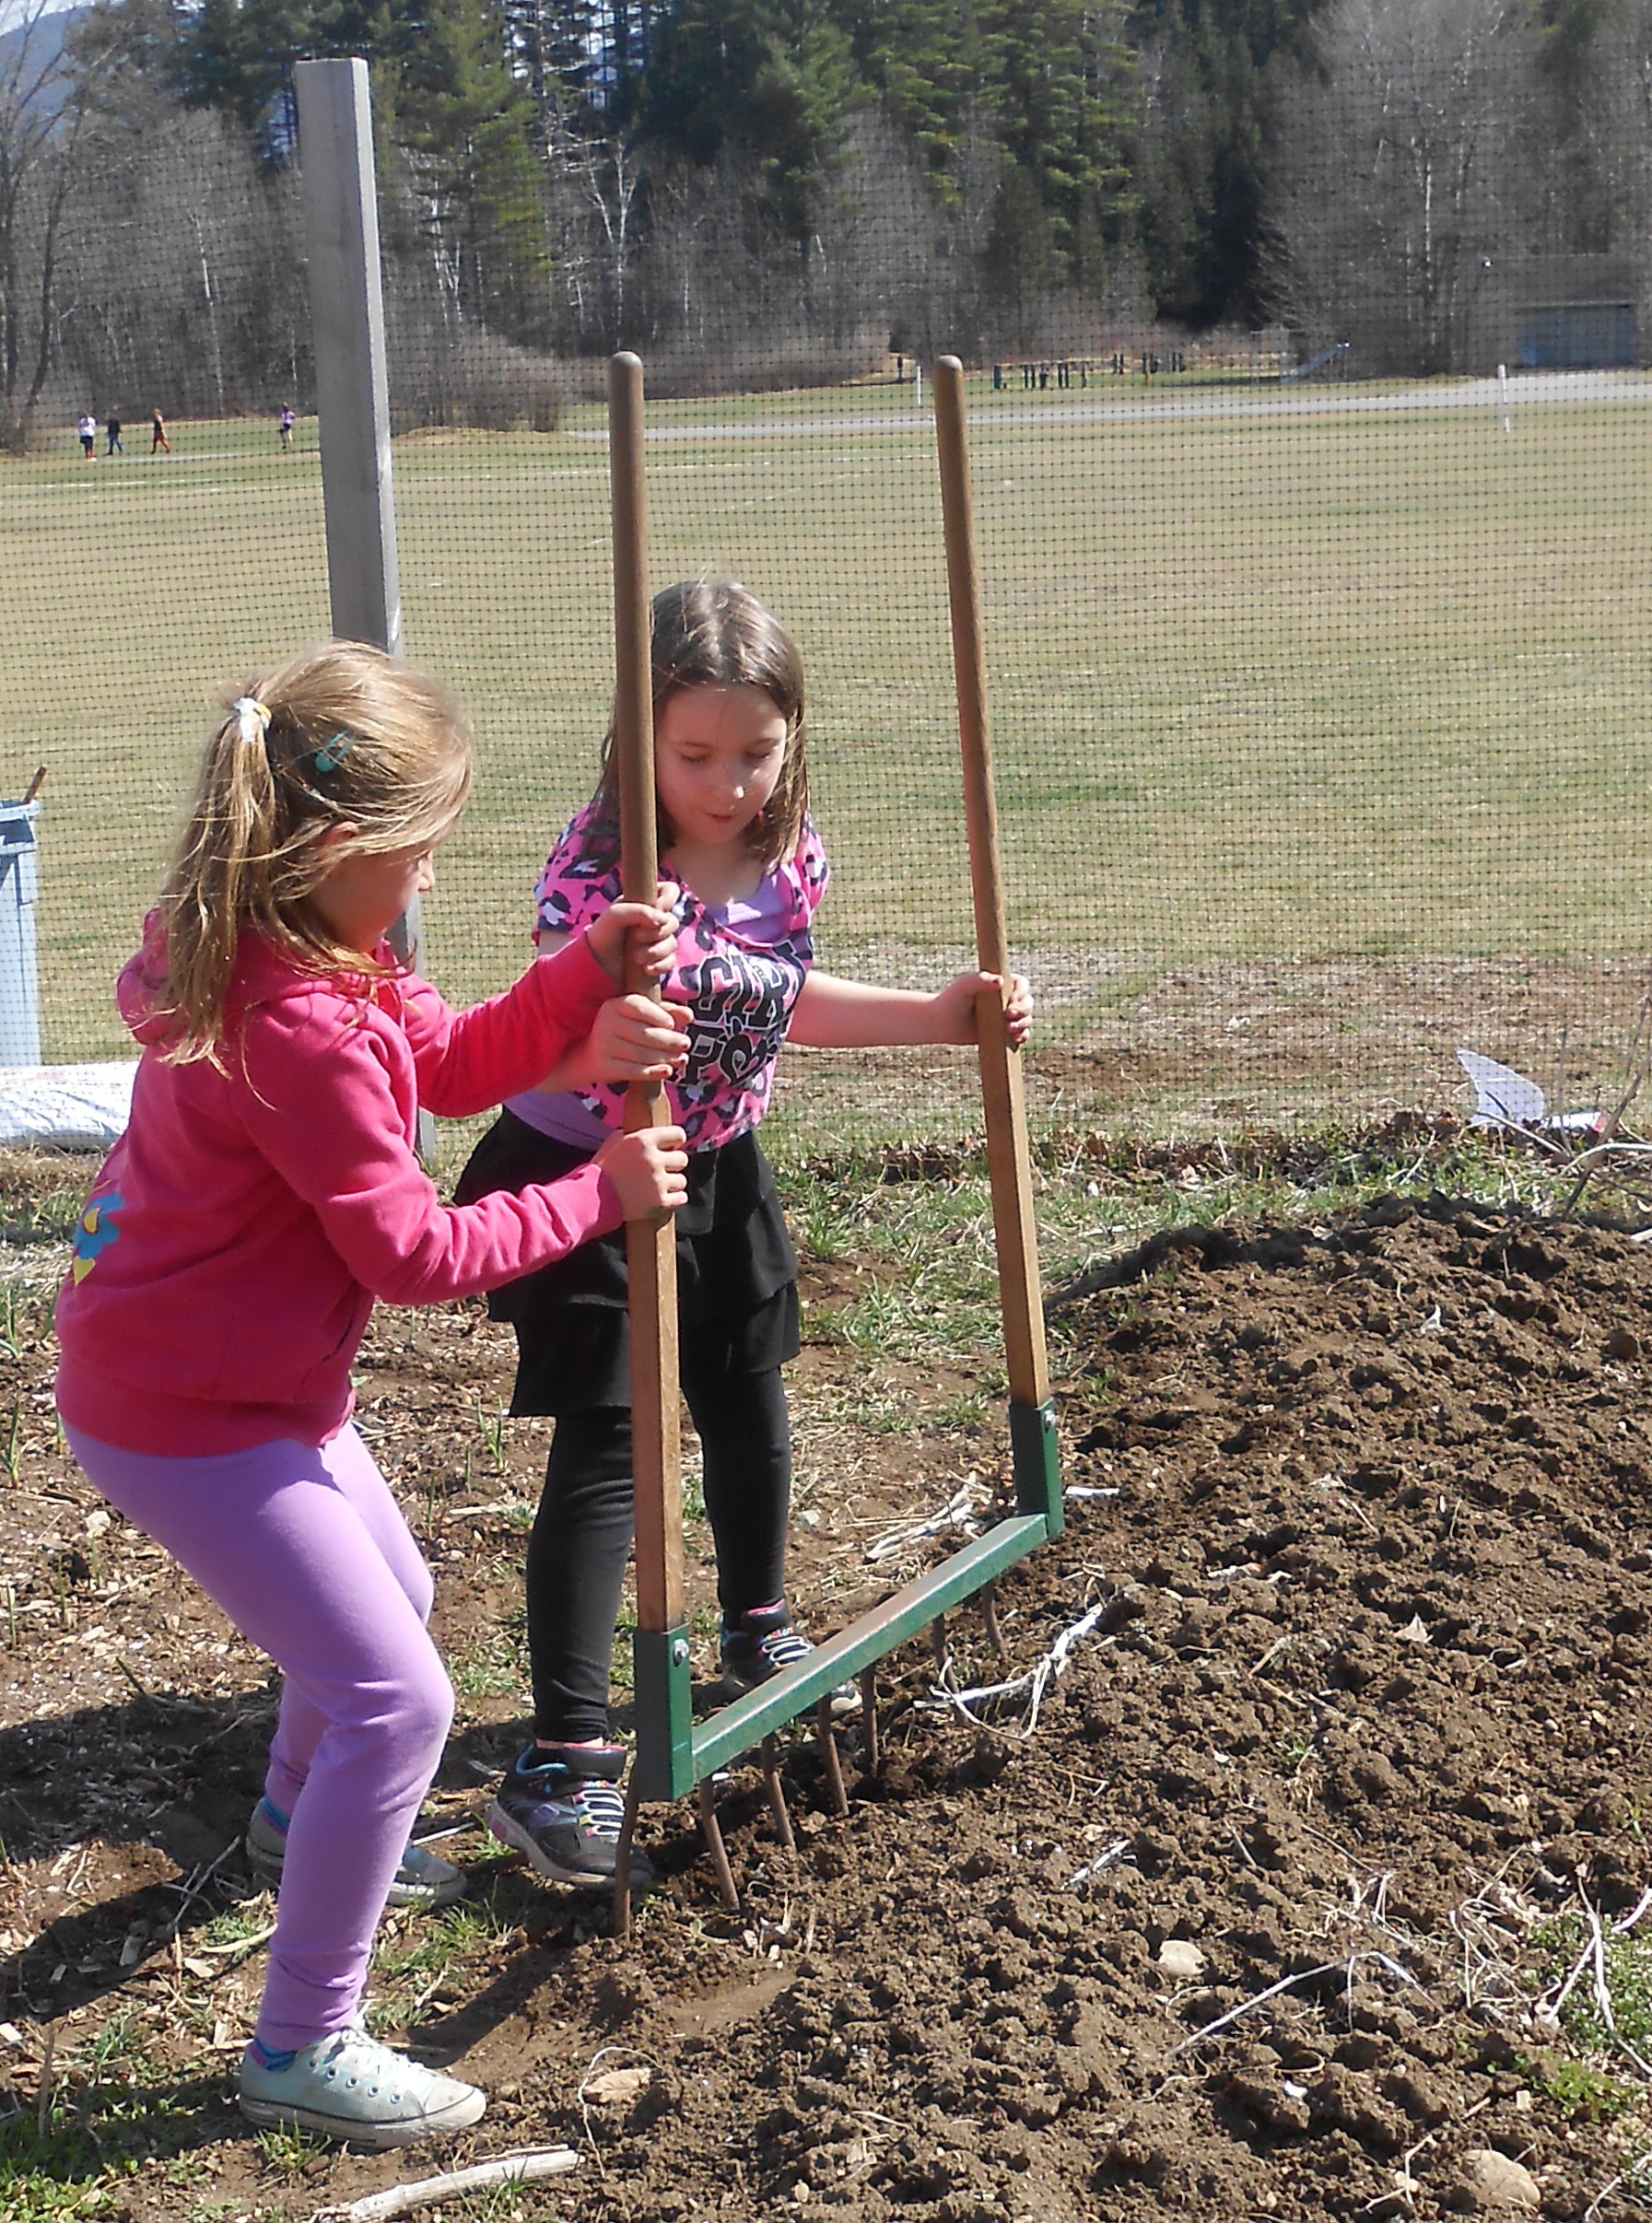
Elementary school girls demonstrating use of the broadfork… child labor at its finest.
The simplest method is to use a broadfork to get the teeth right underneath the bulbs and loosen the soil. After loosening all of your garlic bulbs, follow back through picking the garlic from the soil and placing them in your tote.
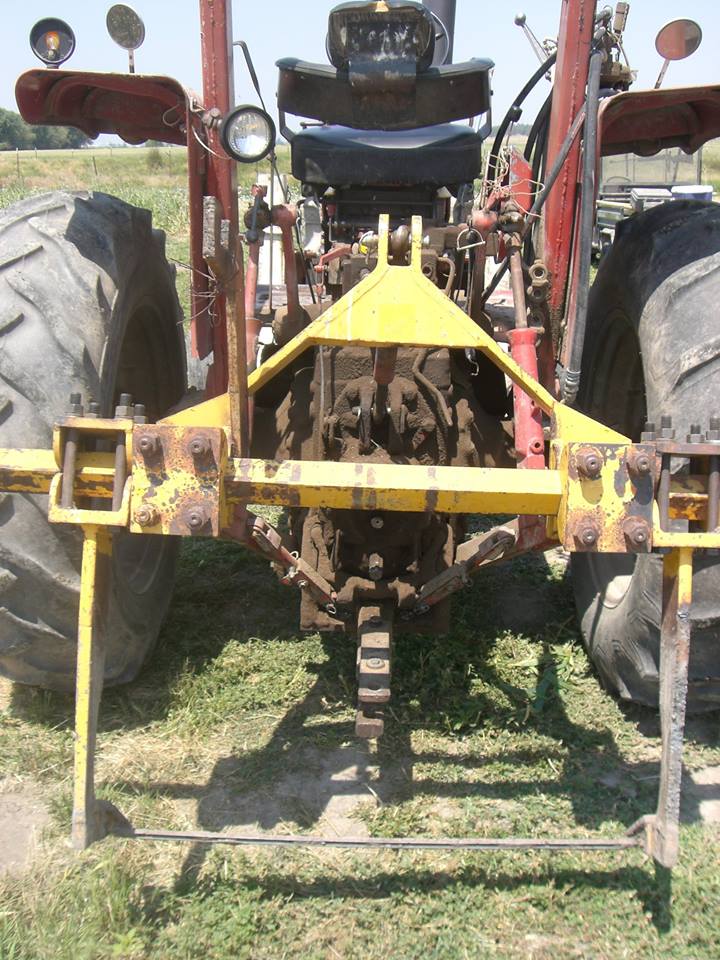
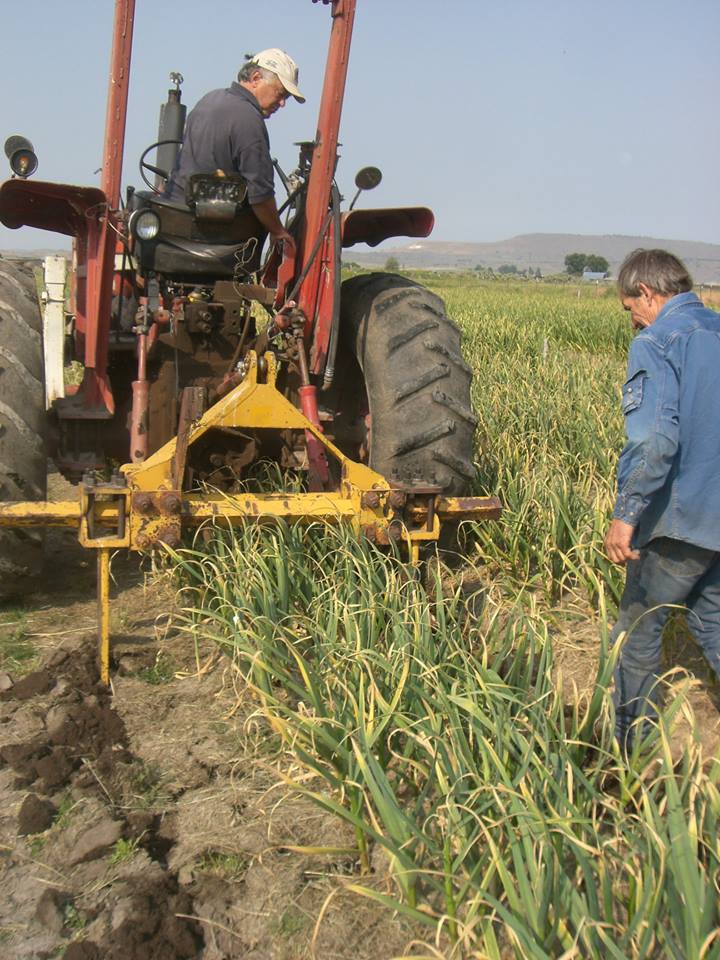
The Garlic Lifter (image courtesy of John Dey)
The Garlic Lifter in Progress (image courtesy of John Dey)
A more sophisticated method that some of our growers use, involves the use of a “cutter” or “lifter.” These tools, often homemade, are dragged behind a tractor in line with the beds and used to loosen the soil, and pop the garlic up. A setup like this is practically essential for anyone harvesting more than 1 acre of garlic.
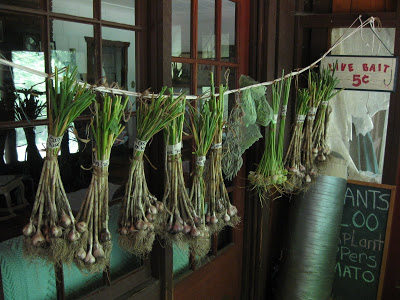
Curing Garlic at Home – (Image courtesy of Subsistence Pattern Food Garden)
VIII – How to Dry and Store Garlic
Now that you’ve harvested your goal is to get your garlic dried out completely before it gets wet.. Our garlic seed growers’ scariest time of the season is immediately after they’ve harvested their garlic. If the rain comes and gets their garlic it can ruin their entire crop!
To dry your crop adequately, you’ll want to dry it upside down until it is completely dry. This is often about 2-4 weeks depending on the humidity and presence of a nice dry wind.
Your goal in storing your garlic crop, as well as life… is to just keep it cool. Man.
Well actually, cool isn’t quite enough. You want to keep it:
cool
dry
and dark.
So, maybe not exactly like life. Unless you’re a bat…
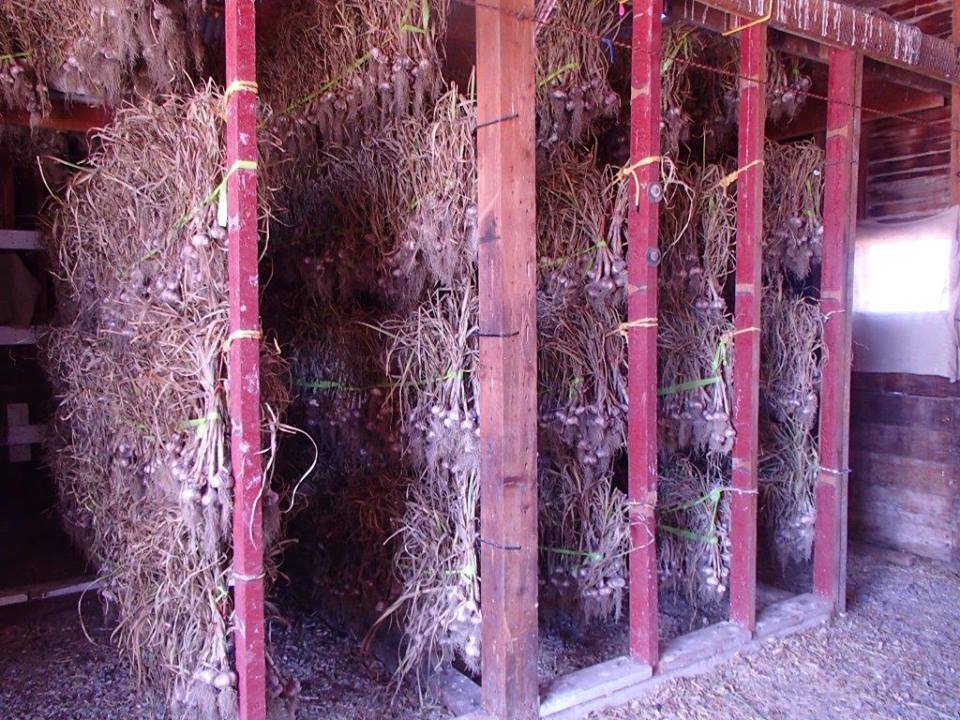
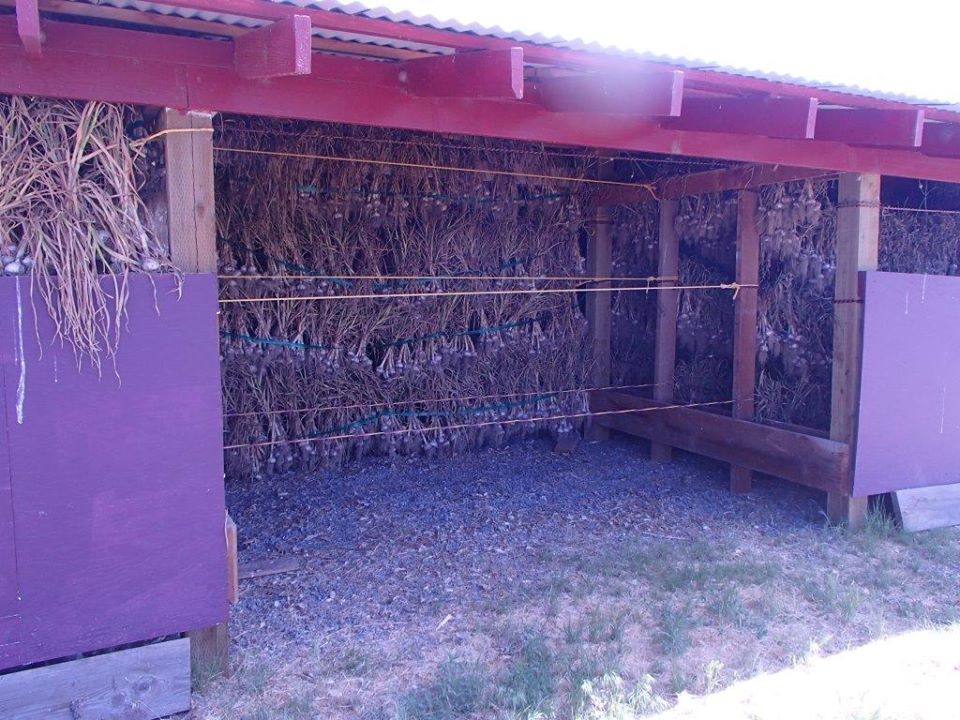
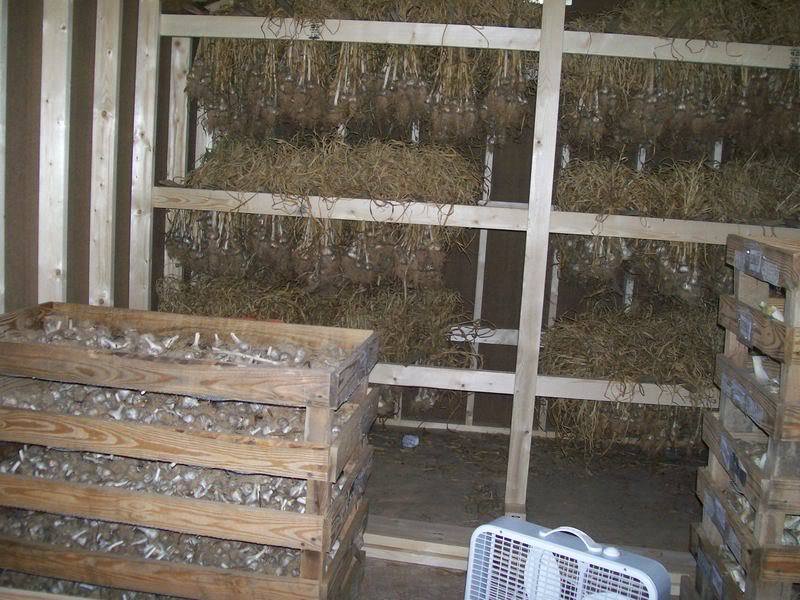
Here are a few different ways that people store their garlic.
John Dey’s setup for curing and storing his garlic. Image courtesy of BigJohnsGarden.com
Another view of John Dey’s setup for curing garlic. Image courtesy of BigJohnsGarden.com
Another garlic curing rack. Courtesy of Natalie Jones Foster
X- A Timeline of Growing Garlic
September – November -After your first frost, plant your garlic
Winter – leave it be
Spring – Weed as they come up. The more mulch you have, the less weeding you’ll need to do, and the easier it will be
Spring (Optional)– If you forgot to plant your garlic last september, don’t sweat it, you can still plant your garlic this spring and everything will be ok. The bulbs you harvest will be a bit smaller, but it sure beats no garlic!
Early-mid June – Watch for your garlic scapes. Cut them off and eat those tasty things! (See the recipe links below)
Mid – Late July – Harvest and start curing your garlic crop!
Mid- August – After your garlic is properly cured, store it in a cool, dry place until you’re ready to eat it or share with your friends.
September – November – Plant your favorite garlic bulbs remembering that the size of the clove you plant will be comparable to the size of the bulb you harvest next year.
There you have it, you’re all ready to grow some garlic. Now, it’s time to get some seed directly from one of our growers. Click the link below to choose your variety